Sunday, August 2, 2020 1 comments By: Ask A Master Gardener

Dutch Elm Disease is Devastating for American Elm Trees


Tom Ingram: Ask A Master Gardener
Sunday, August 2, 2020
Q: I have an American Elm that started looking like it had a problem and then died a few weeks later. What in the world happened? JA
A: The culprit was likely Dutch elm disease. I was speaking with Jen Olson of the OSU Plant Disease & Insect Diagnostic Lab recently and she said she was seeing more Dutch elm disease this year than in recent years, which is too bad because it’s one of the most destructive tree diseases in North America.
Dutch elm disease was first discovered in the Netherlands in the early 1900s, but it didn’t take long for it to make its way to the U.S. It arrived around 1930 on beetles who were hitching a ride on some logs headed our way to make furniture.
Quarantine helped control the disease until 1941, but the nation then became more focused on fighting a war. Some estimates suggest there were approximately 77 million elms in North America in the early ’30s. By 1989, more than 75% of those trees were lost.
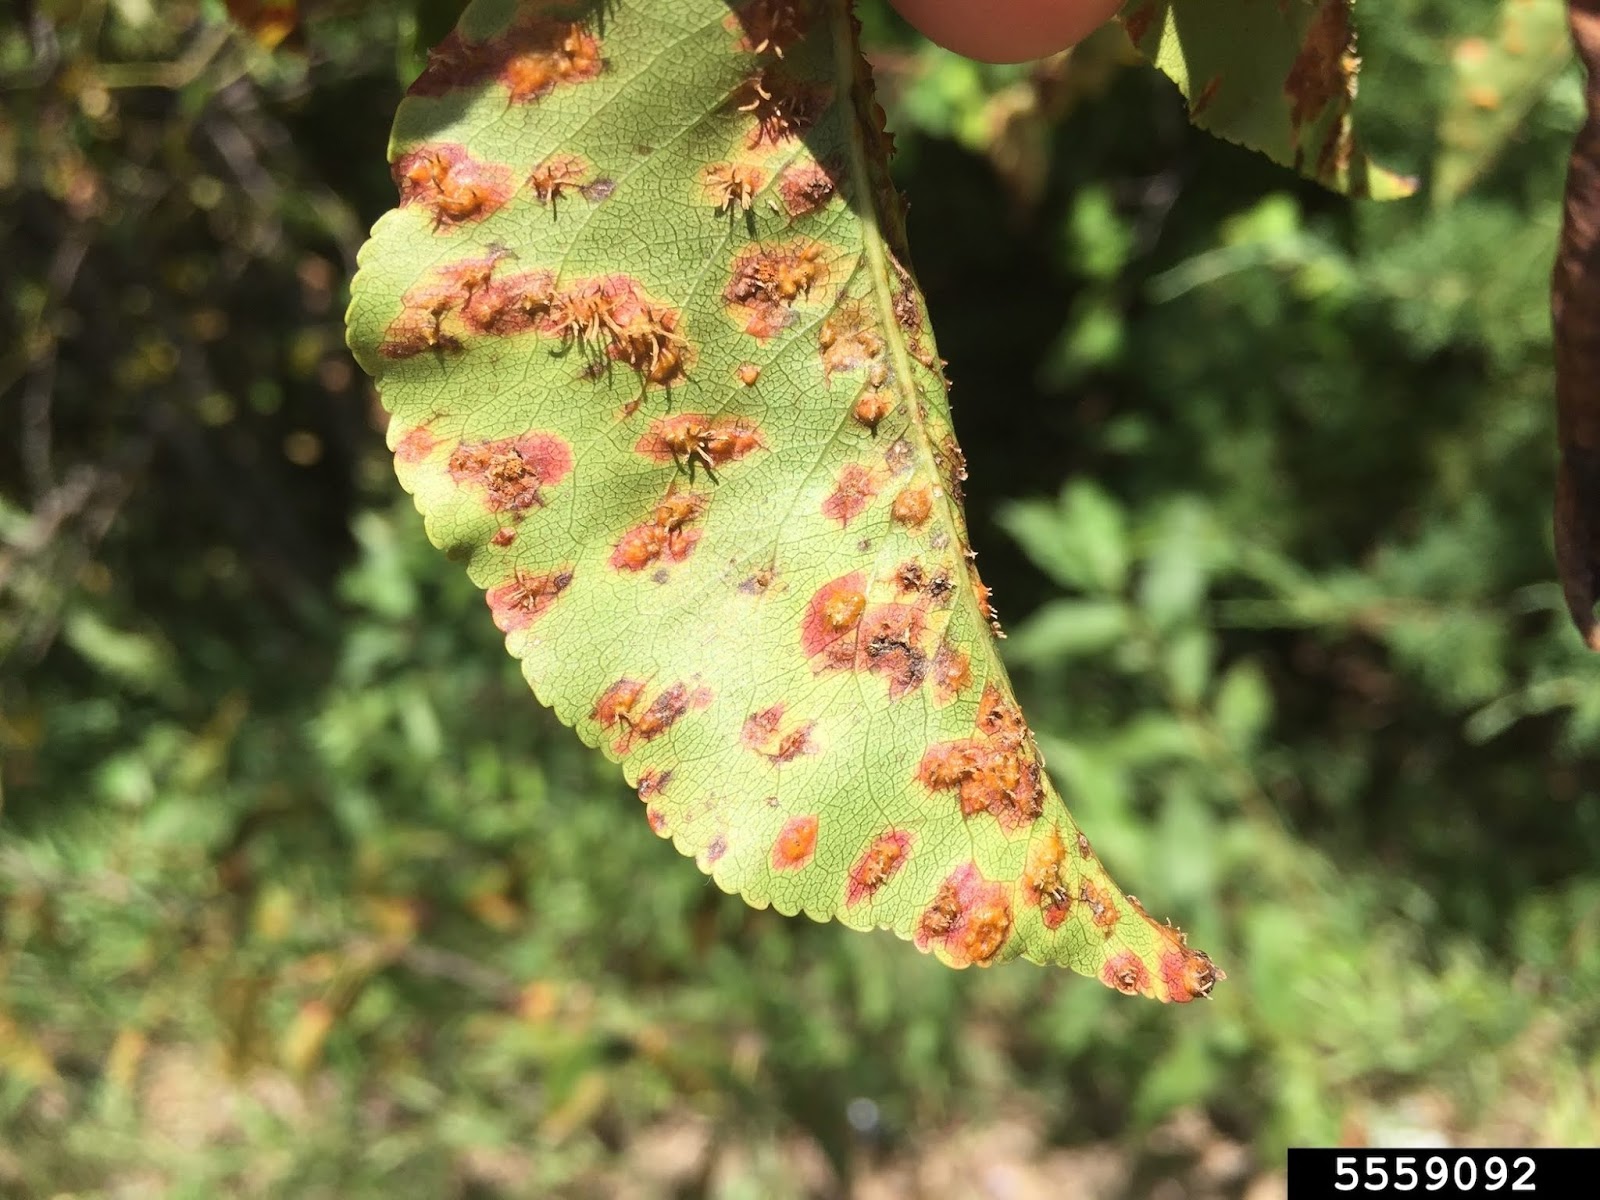
Dutch elm disease grows in the xylem of the tree. The xylem is the tissue that helps bring water up from the roots throughout the entire tree. You typically start to see evidence of Dutch elm disease in the upper branches with leaves gradually browning, then yellowing and eventually getting dry and brittle.
When adult elm bark beetles emerge from under the bark of infected trees in the spring, they are covered with the Dutch elm disease fungal spores. They look for tender young bark on healthy trees to feed upon. Their feeding leaves wounds that become great places for the Dutch elm disease to take hold.
If you suspect your elm may have Dutch elm disease, you can cut off a branch about 1 inch in diameter from an actively wilting section, peel back the bark and look for discoloration similar to that in the photo (the dark strips). To be sure, you can bring a sample to your local Extension Office, and we will send it off to OSU for positive diagnosis.
If you catch the disease early, the infected areas can be pruned out, but you will need a minimum of 8 to 10 feet of un-infected, streak-free wood below the infected areas.
Fungicides and insecticides are available to help prevent Dutch elm disease; however, these chemical treatments should be applied by a licensed arborist because a fungicide may need to be injected into the tree. You can find a licensed arborist for our area at treesaregood.org.
There are a variety of elm species that are resistant to Dutch elm disease, but none is immune. Resistant varieties include Siberian elm, Chinese or lacebark elm, “Valley Forge,” “Princeton,” “New Harmony” or “American Liberty’.”
Garden tips
  • Now is the time to divide and replant crowded hybrid iris (bearded iris). When planting, take care not to plant the rhizomes too deeply. Cover them with an inch of soil or less. Do not mulch iris.
  • Water all plants deeply and early in the morning. Most plants need approximately 1 to 2 inches of water per week. Rather than watering daily, water less often and more deeply.
  • Some trees, such as sycamores and river birches, lose large numbers of leaves in the heat of summer. Trees do this to reduce water loss from their leaves. It is a coping action by the tree; it is not dying.


Sunday, July 19, 2020 0 comments By: Ask A Master Gardener

Bagworm Prevention Requires Proper Timing


Brian Jervis: Ask a Master Gardener
Sunday, July 19, 2020
Q: I have bagworms all over my arborvitae. What can I do to get rid of them? JG
A: Bagworms seem to be everywhere this year. Getting rid of them can be a challenge, but it is possible if you are up to the task. First, let us talk about the bagworm life cycle because understanding their life cycle is key to controlling them.
To begin, let’s go back a couple of months. Bagworm larvae overwinter in the bag and begin to emerge in late April or early May. Once emerged, these larvae begin to feed and construct the bags with which we are familiar. Initially, these bags may be only ¼ of an inch in length. But, as the larvae feed and begin to grow, they increase the size of the bag. This feeding is what can cause damage to the host plant. You mentioned arborvitae, but they also like eastern red cedars and junipers. However, in peak seasons, they can make their homes on pines, spruce, bald cypress and others.
For the female bagworms, the bag is their forever home. They do not develop wings, legs, eyes, or antennae and are almost maggot-like in appearance. Adult females can grow to about 1 inch in length. Males on the other hand grow to become small black moths that have a wingspan of about 1 inch.
Pupation occurs within the bag, and in the late summer or early fall, the males emerge from their bags in search of females. Adult males and females have a short lifespan — the female, a couple of weeks; the male, only a couple of days so the search is on. Neither the adult female nor male feeds. After mating, the adult female lays several hundred eggs within her bag and then dies. The eggs overwinter within the bag only to start the cycle all over again the following year.
So back to your question of what to do about them. With bagworms, timing is everything. When they are in their bags, about the only thing you can do is to remove them by hand, and you can do this any time of year. If your shrub is of an appropriate size, this is a good strategy, one the kids might enjoy helping with as well. Once the bags are collected, they need to be destroyed or placed in a sealed bag in the trash.
About the only other time you have a shot at control is in April and May when the larvae are feeding. During this time, you can spray with an organic pesticide called Bacillus thuringiensis or Bt for short. This organic pesticide only affects feeding caterpillars. You spray the pesticide on the infested plant, they ingest the pesticide while eating and die. Spraying this time of year while the bagworms are in their bags will not be an effective strategy as the bag does a great job of protecting them from harm.
Typically, damage is minimal from bagworms. However, infestations that build up over time can be detrimental to the health of your plant. So taking appropriate action at the appropriate time is key to bagworm control.
Get answers to all your gardening questions by calling the Tulsa Master Gardeners Help Line at 918-746-3701, dropping by our Diagnostic Center at 4116 E. 15th St., or by emailing mg@tulsamastergardeners.org.
Garden tips

·        When watering your lawn, ornamentals, or vegetables, always do so in the morning if possible. If watered in the evening, plants will go into the night still being moist. Most disease-causing organisms need moisture, and because they grow best at night, leaving leaves wet in the evening will promote many plant diseases.
·        Bulb onions are ready to harvest when the tops fall over. They should be removed and allowed to dry in a well-ventilated, shaded area. After the tops are completely dry, they may be stored in a cool, dry area.
·        Tall, spindly tomato plants with scarce fruit are usually due to either too much nitrogen fertilizer or too much shade.


Monday, July 6, 2020 0 comments By: Ask A Master Gardener

The Many Myths of Epsom Salts


Tom Ingram: Ask a Master Gardener
Monday, July 6, 2020
Q: I keep seeing posts online that recommend adding Epsom salts to the soil when planting tomato plants. Is this something I should be doing? JE
A: The internet seems to be abuzz with many near-miraculous claims attributed to Epsom salts. Before we talk about those, let’s talk about Epsom salts and a bit of soil chemistry.
Epsom salts is magnesium sulfate. Magnesium is one of the secondary nutrients found in healthy soil, and Epsom salts can be utilized as a soil additive if you have a magnesium deficiency. However, magnesium deficiencies are not common in home gardens.
Magnesium deficiencies can be found in soil that has been under intensive production over an extended period or in soil that has experienced a great deal of nutrient leaching due to excessive rainfall or irrigation. In this instance, adding magnesium would be an appropriate strategy to remedy a magnesium deficiency.
Potassium is one of the big three soil nutrients (nitrogen, phosphorus and potassium), and high levels of potassium in soil can interfere with magnesium uptake, but adding additional magnesium to the soil will not overcome the problem created by an abundance of potassium.
On the flip side, adding magnesium to soil that is not deficient in magnesium can interfere with potassium uptake, which may result in a potassium deficiency in plants even if the soil has adequate potassium supply.
Rather than continue to dig deeper into soil chemistry, let’s look at some of the claims we often see associated with adding Epsom salts to your gardens.
1. Epsom salt helps with seed germination.
Seeds have all the nutrients they need to germinate within the seed and can germinate in a wet/damp paper towel. Epsom salts does not aid in this process.
2. Put a scoop of Epson salts into each hole when planting tomatoes to prevent blossom end rot.
Blossom end rot is a common malady in tomatoes that is caused by a calcium deficiency. Adding Epsom salts when planting tomatoes not only does not help prevent blossom end rot but also can contribute to its occurrence because magnesium and calcium compete for uptake into the plant. An abundance of magnesium present in the soil will encourage less calcium uptake, thus increasing the potential for blossom end rot.
3. Use Epsom salts as a foliar spray to help tomato plants grow and enable a larger harvest of better-tasting fruit.
Again, this is unnecessary unless you have a magnesium deficiency.
4. Epsom salts are highly soluble so you can’t overuse it.
Epsom salts are in fact highly soluble; however, unnecessary nutrients applied in excess typically become a pollutant as they will be washed out, landing in unwanted areas.
5. Epsom salts can help plants grow bushier.
This would be true if you have a magnesium deficiency but not true as a general all-purpose additive.
So how can you tell if you have a magnesium deficiency? Magnesium helps with the production of chlorophyll so plants grown in magnesium-deficient soil will lose their deep green color and their ability to photosynthesize. Therefore, if you are seeing yellow leaves with stunted growth, you may have a magnesium deficiency. But remember, this is not common in home gardens.
If you have concerns about a magnesium deficiency in your garden soil, before you start adding Epsom salts, you should get your soil tested by the OSU Extension (be sure and say you want your secondary nutrients tested also) but know, we rarely find a magnesium deficiency in residential soil tests. Best strategy … save your Epsom salts for your bath.
Garden tips
• Vigorous, unwanted limbs should be removed or shortened on new trees. Watch for forks in the main trunk and remove the least desirable trunk as soon as it is noticed.
• Most varieties of mums are more productive if “pinched back” now. Either pinch off with fingers or cut to remove an inch or so of limb tips above a leaf. This results in the growth of new limbs and a fuller plant. Do not pinch after mid-July or it will interfere with fall blooming.
• Watch for tiny, sap-sucking insects called aphids on roses, perennial flowers, shrubs and vegetables (especially tomatoes). They produce a sticky substance called “honeydew”. Many can be dislodged with a hard spray from your garden hose or 2 applications of insecticidal soap will usually greatly reduce any aphid damage to your plants.
• Crapemyrtles are one of the few shrubs that should be planted in the middle of summer. Growth of new roots of these plants occurs best with summer soil temperatures.


Sunday, July 5, 2020 0 comments By: Ask A Master Gardener

Now is the Time to Start A Fall Vegetable Garden


Fall Vegetable Gardening
Brian Jervis: Ask a Master Gardener
Sunday, July 5, 2020
Q: I have heard good things about fall gardening but know nothing about it. When can I start and what can I plant? JP
A: For many gardeners, gardening is a year-round adventure, not just something we do in the spring and summer. And as summer is starting to hit full steam, now is the time to start planning and getting ready for your fall garden.
When we talk about fall gardens, we split fall garden vegetables into two categories: tender and semi-hardy. Tender vegetables will not make it past the first frost. Semi-hardy vegetables can endure several frosts and keep producing.
Tender varieties, such as pole beans, bush beans, cilantro, eggplant, peppers, pumpkin, squash and tomatoes, among others, can be planted starting around mid-July.
Semi-hardy crops can be planted a little later. These would include beets, broccoli, Brussels sprouts, cabbage, potatoes, etc.
Fall gardening has several advantages. One of those is that you can get some of the best quality vegetables from your plants due to the warm days and cool nights later in the season. Another advantage comes from the fact that some of the insects we have been battling won’t be as much of a problem due to the timing of their life cycle. But it’s not all fun and games because we still have July and August to deal with.
In the spring, we are challenged with cold soil temperatures so many of us start our seeds indoors and move the plants outdoors when the soil has warmed up. In the fall, we do the same thing but for opposite reasons: We start our seeds indoors so they can germinate in cooler conditions and then move the plants outdoors.
Direct seeding becomes problematic for fall gardens and may require extra effort on your part due to high soil temperatures. Exposed soil on a hot day in July and August can warm up to 140 degrees. This presents challenges to direct seeding as these high temperatures will prevent germination. If you do direct seed, you will need to protect those tiny seeds by using a thick layer of mulch or perhaps covering them with shade cloth to help keep the soil cooler.
We have a great fact sheet on our website that gives you a list of veggies you can grow in your fall garden, as well as information on when to plant, how to plant and number of days before harvest. You can find it in our Hot Topics section on our homepage.
Also, if you are new to gardening or just want to learn more, you can sign up for our Online Urban Gardener classes and learn about soil, vegetable gardening, pollinator gardens, trees and shrubs, and turf management. Info on these classes can be found by clicking on the Urban Gardener link on our homepage at tulsamastergardeners.org.
Good luck and happy gardening.
Get answers to all your gardening questions by calling the Tulsa Master Gardeners Help Line at 918-746-3701, dropping by our Diagnostic Center at 4116 E. 15th St., or by emailing mg@tulsamastergardeners.org.
Garden tips
  • Divide and replant crowded hybrid iris (bearded iris) after flowering until August. When planting, take care not to plant the rhizomes too deeply. Cover them with an inch of soil or less. Do not mulch iris.
  • Water all plants deeply and early in the morning. Most plants need approximately 1 to 2 inches of water per week. Rather than watering daily, water less often and more deeply.
  • Some trees, such as sycamores and river birches, lose large numbers of leaves in the heat of summer. Trees do this to reduce water loss from their leaves. It is a coping action by the tree; it is not dying.


Tuesday, June 23, 2020 0 comments By: Ask A Master Gardener

Good Garden Practices Prevents Problems


Good Garden Practices
Tom Ingram: Ask a Master Gardener
Tuesday, June 23, 2020 
Q: It seems like there is always something wrong in my garden. If it’s not insects, it’s some sort of disease. What am I doing wrong? JK
A: It can seem like that sometimes but let us talk a little bit about disease prevention rather than just how to deal with disease once it happens.
Resistant plants and seeds:
If you start your vegetables from seeds, purchase disease-resistant seeds. If you are like most people, you will say, “How the heck do I do that?” Well, most vegetables have varieties that are more disease resistant than others. Heirlooms (for example) are typically traditional cultivars that have been passed down from generation to generation that remain true to their heritage. As such, they can be more susceptible to disease because they do not have the advantage of having disease resistance bred into them via hybridization. Hybrids are not GMOs; they are varieties that have been cross-pollinated with other varieties to either increase production, increase disease resistance or both. For example, seed packets for tomatoes indicate their disease resistance with the letters V, F and N. Seeds with those disease-resistance indicators would be naturally resistant to Verticillium Wilt, Fusarium Wilt and Nematodes. So right from the start, you are ahead.
Also, try to purchase healthy plants. As gardeners, we all know that the bargain table with the sickly looking plants can be tempting. But try to remember these plants are there for a reason. The reason might be disease. If you cannot resist (and many of us can’t), try to keep them away from your other plants until you nurse them back to health.
Crop rotation
If you plant tomatoes in the same spot every year, disease pathogens can build up in the soil, becoming a bigger problem each year. To counteract this, you can rotate your crops. Some people rotate every year, but for sure, it’s good practice to rotate at least every three years. But here is the trick; you need to learn about the vegetable families because vegetables in the same family are usually susceptible to the same diseases and you might be surprised by who is in the same vegetable family. Tomatoes are in the solanaceous family, so are potatoes, eggplant and peppers. So if you are going to rotate your crops, don’t plant potatoes where the tomatoes were. Brassicas include broccoli, cauliflower, Brussels sprouts, kale, radishes, etc. Legumes include the bean family. And the others kind of make sense. So rotate by family, not just vegetable.
Garden practices:  You need to be aware of how your garden practices might be contributing to plant disease. First, you should water in the morning. When you water in the morning, the water can evaporate off the plant and soak into the soil before the heat of the day. Watering at night can leave the leaves of your plants wet, and wet leaves are more prone to disease. Also, be sure to water the roots, not the leaves. The roots need the water, the leaves do not.
And clean your tools. If you have been trimming or pruning infected branches or leaves, wash your tools with a 10% bleach solution to prevent spreading the disease to other plants.
If these habits become part of your garden practices, you will be well on your way to minimizing plant disease and being a happier gardener.
Garden tips
·        White grubs will soon emerge as adult June Beetles. Watch for high populations that can indicate potential damage from grubs of future life cycle stages later in the summer.
·        Fertilize warm-season grasses at 1 pound Nitrogen per 1,000 square feet. Do not fertilize fescue and other cool-season grasses during the summer. Because nitrogen is soluble in water, much of it may have been lost due to percolation and runoff if you fertilized before recent rains.


Sunday, June 21, 2020 0 comments By: Ask A Master Gardener

Squash Vine Borers


Brian Jervis: Ask a Master Gardener
Sunday, June 21, 2020
Q: My squash plant was big and beautiful, and then one day, the leaves started turning yellow and in a few more days it was dead. What happened? RW
A: The culprit was likely the squash vine borer. These insects can be a problem for all cucurbit plants and are the reason many of us no longer grow squash but grow cucumbers instead. Yes, I know cucumbers are cucurbits too, but they don’t seem to bother cucumbers like they do the squash.
Squash vine borers overwinter in the soil as either larvae or pupae. Adult moths begin to emerge in June (possibly sooner if we have a mild winter like we have had) and remain active through August.
During this time, they find a mate. The female deposits her eggs, usually about a dozen or so at a time, on the stem of the squash plant near ground level. The eggs hatch and the larvae enter the stem to begin feasting on your beautiful squash plant. They essentially eat out the inside of the stem, destroying the plant’s ability to draw up nutrients into the rest of the plant.
Signs of this not only include the yellowing and wilting of the leaves on your squash plant, but you will also see something that looks like wet sawdust on the stem of the plant. This is the excrement (frass) of the borer inside of the stem.
These larvae continue to feed for four to six weeks and can migrate to other plants if their host plant dies or ceases to become suitable for their needs.
These borer larvae are white or cream colored and can be easily seen by slicing open the vine in the affected area. The fully grown moth is primarily black and orange and is easily mistaken for a wasp.
Squash vine borers are worthy adversaries and controlling them can prove difficult. The first line of defense will require diligence on your part. This entails visually inspecting your plant stems near the soil line for eggs. If eggs are found, they can be destroyed.
If you missed the eggs and are seeing evidence of the squash vine borer (frass), you can gently slit the stem and remove the larvae. Once removed, you should cover the damaged part of the stem with soil. With any luck, you will continue to get production from your plant.
Weekly preventative applications of an organic insecticide during the active months can also help. An organic pesticide like spinosad should be applied to the stalk of the plant near the soil level during their period of activity. But be careful to only spray the base of the stalk and spray late in the evening, as you don’t want to harm any of the pollinators working on your behalf to get you some squash.
As an alternative strategy to weekly pesticide spraying, pheromone traps can be placed in your garden near your squash plants. When the squash vine borer moth shows up on your trap, you know it is time to begin spraying the stalks near the soil with spinosad.
And last but not least, because squash vine borers overwinter in the soil, tilling the soil at the end of the season can help disrupt their life cycle.
Good luck!
Garden tips

·        Remain alert for insect damage. Add spider mites to the list. Foliage of most plants becomes pale and speckled; juniper foliage turns a pale yellowish color. Shake a branch over white paper and watch for tiny specks that crawl. Watch for first-generation fall webworm.
·        Some pests can be hand-picked without using a pesticide. Do not spray if predators such as lady beetles are present. Spraying insecticides early in the morning or late in the day will avoid spraying honeybees and other essential pollinators.


Sunday, June 7, 2020 0 comments By: Ask A Master Gardener

Soil Tests Help Select a Fertilizer


Tom Ingram: Ask a Master Gardener
Sunday, June 7, 2020
Q: With all the different fertilizers out there, how do I know which one I should be using? AR
A: Fertilizers can be confusing. They come in a variety of strengths with a variety of numbers and for the beginner or novice, it can be overwhelming. So let’s break it down.
The fertilizers you find at the store have a series of numbers on the bag. These numbers can be something like the following: 10-20-10, 19-19-19, 3-17-17, 31-0-4, 46-0-0, etc. Those numbers coincide with the percentage of nitrogen, phosphorus, and potassium in each particular product. So, if a product says it is 10-20-10, that means it contains 10% nitrogen, 20% phosphorus and 10% potassium. If it says 46-0-0, that means that it contains 46% nitrogen, 0% phosphorus and 0% potassium.
So how do you know which one you should use?
The best way to know for sure is to have your soil tested. This may sound a little intimidating, but it is a simple process.
First, you will need to collect the soil sample. You can collect this sample using a specialized soil sampling tool or just use a garden trowel. A bulb planter works well also. The trick is to get between 15-20 samples from the area you want tested. These samples need to contain soil to a depth of 6 inches. If this is your yard, get 15-20 samples from various points in your yard, put them in a bucket, mix it up, remove the twigs and fill something about the size of a sandwich bag from the soil in your bucket. If you are wanting a soil test for your vegetable garden or your flower bed, get your 15-20 samples from those areas.
Once you get your soil sample in a bag, bring it to the OSU Extension office, 4116 E. 15th St. Even though the office is closed, there is a black mailbox on the south side of the building (in the back) where you can fill out a form and leave your sample. There is a $10 charge for a soil test. We will pick it up and forward it to OSU, where they will test for pH, nitrogen, phosphorus and potassium. Once tested, you will get a recommendation on what nutrients are needed for your situation. These recommendations will vary depending on what area you are sampling and what you are growing.
Once you have the results of your soil test, you will know how much of each nutrient you need to add to your soil for best results.
So back to the fertilizer. Let us say the test revealed your soil only needed nitrogen, and it was recommended that you add 1 pound of nitrogen for every 1,000 square feet. In this case, you could purchase some 46-0-0 fertilized because it is 46% nitrogen and does not contain phosphorus or potassium. This means that if each pound of fertilizer is 46% nitrogen, you would need about 2 pounds of fertilizer to give you 1 pound of nitrogen. If you purchased 10-20-10, you would need 10 pounds of this fertilizer to give you the 1 pound of nitrogen. Plus (in this case) you would be purchasing phosphorus and potassium that you didn’t need and which might also be harmful to your growing environment.
Yes, you may need to use a calculator, but odds are that getting a soil test will not only be good for your soil but also will ultimately help you save money by not having to purchase nutrients you don’t need.
Garden tips

•Do not work soil if it is too wet. Tilling it while wet will cause damage to the structure and it will take a long time to recover.
•Thatch is a layer of dead and living stems, shoots and roots which pile up on top of the soil at the base of lawn grasses. If it is over ½ thick it should be removed with either a core-aerator or power-rake. Now is the time to de-thatch Bermuda and zoysia. De-thatch fescue, if needed, in the fall.


Thursday, June 4, 2020 0 comments By: Ask A Master Gardener

Non-infectious Tomato Problems


Brian Jervis: Ask a Master Gardener
Thursday, June 4, 2020
Most of us have had our tomatoes in the ground for a while and are looking forward to some delicious fruit soon. However, our journey from planting to eating typically comes with a few challenges.
Tomatoes can be persnickety. Everything has to be just right to get fruit and then when things are going great, along comes an insect or a disease to frustrate your efforts.
We will talk about some of those issues in future articles, but first, let us talk about noninfectious diseases in tomatoes because most of these are the result of some sort of environmental challenge.
Blossom drop: Here is the scenario. Our plants are in the ground, we are getting flowers, and we are looking forward to those flowers developing into fruit. But instead, those flowers fall off and drop to the ground … thus the name “blossom drop.” Typically, we see blossom drop when we have settled into regular daytime temps above 90 degrees, as this heat inhibits pollination.
However, cooler temperatures can also contribute to blossom drop when our night temperatures are below 55 degrees. We have had weather like that recently, and some of you have been experiencing blossom drop due to cooler temperatures. However, once it warms up, you should begin to get fruit on your tomatoes.
Blossom-end rot: Blossom-end rot is pretty easy to spot when you notice the blossom-end of your tomato turning brown. Gradually, the brown spot gets bigger, is sunken and feels somewhat leathery. This area of the fruit then becomes susceptible to pathogens that result in the fruit rotting.
Blossom-end rot can be the result of several different factors; high temperatures, wind, fluctuating water availability and drought can all promote blossom-end rot. But so can excessive soil moisture for prolonged periods of time. These conditions inhibit the plant’s ability to draw up calcium from the soil, and so blossom-end rot is ultimately the result of a calcium deficiency.
However, adding calcium to the soil is not a solution to the problem because no matter how much calcium you add to the soil, the environmental conditions have not changed, and the plant is still not able to lift those nutrients up into the plant.
There are a lot of solutions online to blossom-end rot suggesting putting eggshells in a blender and sprinkling them around your plants. This will eventually add calcium to your soil, but it will not help solve the blossom-end rot problem, only time and drier conditions will do that.
Catface: Catfacing is an interesting one in that it shows up as misshapen fruit with what appear to be scars. Again, this is another temperature-related problem that can occur when temperatures are below 58 degrees when the flower is being formed. Turf-weed pesticides that contain 2,4-D can also be a contributor if they come in contact with your plant.
These are some of the main noninfectious disease problems we see in tomatoes, but you can learn about more on our website (tulsamastergardeners.org) by looking in our Lawn & Garden Help section under vegetables.
Garden tips

 Yellow leaves on plants may be due to too much water in the soil. With the deluge of recent rain and the subsequent saturation of the ground, some plants may show damage, often yellow leaves on the lower part of plants. This occurs both in ornamental and vegetable plants.
• Commonly, yellowness is due to lack of iron or nitrogen in the soil. However, when the soil is saturated with water, oxygen is forced out of the air spaces and the roots suffocate. This prevents them from absorbing nutrients, resulting in the yellow appearance. As the soil dries out, this problem will correct itself.
• Some pests can be hand-picked without using a pesticide. Do not spray if predators such as lady beetles are present. Spraying insecticides early in the morning or late in the day will avoid spraying honeybees and other essential pollinators.


Sunday, May 24, 2020 0 comments By: Ask A Master Gardener

Master Gardeners Educational Activities


Master Gardeners Educational Activities
Brian Jervis: Ask a Master Gardener
Sunday, May 24, 2020
So much of what we do as Master Gardeners involves community engagement. We teach classes, we speak at various civic groups, we have exhibits at community events, we staff our Diagnostic Center at the OSU Extension, and we teach elementary school students about horticultural issues, among other things.
All that came to an abrupt halt a few weeks ago. Like most of us, Master Gardeners have had to learn new ways to help our community during this time.
With so many new gardeners in our midst, we have struggled with how to best help you. Let me tell you a little bit of what we have started to do to help bridge the gap between social distancing and the community needs for horticultural education.
First of all, for kids, we started our new online Fun Pages for Kids. On each fun page, there is a short video, a trivia game, and a coloring page.
We have three Fun Pages currently and hope to release a new one each week, at least through the summer. Current Fun Page topics include one about the lifecycle of Monarch butterflies, honeybees, and worms. The Fun Pages can be found through a link on our homepage: tulsamastergardeners.org.
For the grownups, we have migrated our popular Urban Gardener training classes to an online format for now.
In this series, there are six sessions covering almost everything you need to know to become a more successful gardener. Topics include soil, growing vegetables, pollinator gardens, trees and shrubs, and turf management.
Each session includes an instructional video, links to supplemental materials and additional videos for those who want to dive deeper.
We miss the in-person classes but think these online classes will be helpful for at least the near future.
While the OSU Extension may be closed, soil testing is alive and well with a little bit different process. At this time, soil for soil tests can be dropped off at the extension without human contact.
At the back of the OSU Extension building, there is a black drop-off box with instructions on how to leave your soil sample. We will pick them up and get them to OSU for testing.
It typically only takes about two weeks for you to get your results with recommendations on how to amend your soil properly.
Even though our Diagnostic Center is closed to the public, we are continuing to check the phones for messages and our email account for questions. Each call and email will be answered like always, just not in real-time.
Also, for the next few weeks, we will be live on our Facebook page from noon to 1 p.m. Thursdays to answer your gardening questions. If you are a Facebook person, join us during lunch with a question on the Tulsa Master Gardener’s Facebook page.
We hope everyone stays safe and is using this time to up their gardening game.
Garden tips

·        Clean out water garden and prepare for season. Divide and re-pot water garden plants. Begin feeding fish when water temperatures are higher than 50 degrees.
·        Plant warm-season vegetable crops, such as watermelon, cantaloupe, cucumber, eggplant, okra, sweet potatoes, etc., now.
·        Fruit trees, especially apples and peaches, must be thinned out for best production. Prune apples 4-6 inches apart and peaches 6-8 inches. This will ensure larger fruit and less damage to limbs. If not thinned, the tree's resources will be used to such an extent that next year’s crop will suffer.


Thursday, May 14, 2020 0 comments By: Ask A Master Gardener

Fungal Rust Disease of Pears and Many Other Trees


Rust Diseases on Pears and Others
Tom Ingram: Ask a Master Gardener
Thursday, May 14, 2020
We break from tradition today and are not going to answer a single question but rather address a topic that has been flooding our Diagnostic Center via phone and email: fungal diseases in trees and shrubs. And when I say flooding, I mean flooding.
This spring has been cool and moist for the most part and still is. These are perfect conditions for fungal diseases in plants.
There are a variety of fungal diseases with a variety of names, but in my book, the most interesting one is rust disease. There are several rust diseases: cedar-apple rust, Asian pear rust, cedar-hawthorn rust and cedar-quince rust, to name a few. These diseases are not extremely harmful but can be detrimental to the vigor of both hosts, as well as diminish the productivity of fruiting trees.
One thing that is interesting about these diseases is that they bounce back and forth between different plants with the common link being the cedar (aka juniper). This year, it seems like almost every pear tree in town (including Bradford pears) is covered with Asian pear rust.
While this explanation can seem a little like “which came first: the chicken or the egg,” let’s give it a shot.
The spots we are seeing on pear and apple tree leaves this spring are the result of fungal spores that have blown from a nearby cedar. Nearby is a relative term and typically means within a mile or so, maybe more.
The fungal spots on the apple and pear leaves mature somewhere around June or July. Once mature, they begin to release their own spores, which are then blown by the winds in hopes of finding a cedar to call home.
Asian pear rust causes fairly small rust twig cankers on the cedars, while cedar-apple rust causes small galls to be formed. Fast forward a few months and spring rains cause these cankers to release their own spores, which go out in search of another broadleaf host. Lather, rinse, repeat.
While the Asian pear rust cankers are fairly small, cedar apple rust galls can be golf ball sized. But it gets better. When spring rains soak the cedar-apple rust galls, they begin pushing out these long orange gelatinous tendrils full of spores, which then ride the wind in search of a new home. It is quite a sight.
To control these diseases, the hosts need to be separated, but in town, that is next to impossible. So we are primarily left with treatment options.
Susceptible broadleaf trees, such as apples or pears, can be treated in the spring from the point their leaves emerge through April on seven- to 10-day intervals with a fungicide that includes one of the following ingredients: copper hydroxide, chlorothalonil, myclobutanil and propiconazole (use as specified on the labels). Cedars can be treated in late June-July with the same fungicides. However, you can always physically remove the galls from the cedars when you see them.
For fruiting trees, we recommend you follow a pesticide spraying schedule that can be found in the Hot Topics section on our website, tulsamastergardeners.org.
Garden tips

·        Nutsedge weeds are emerging now. Post-emergent treatments are best applied for the first time this month. Make certain warm-season grasses have completed green-up. Nutsedge control requires specific treatment for control; standard broadleaved post emergent herbicides are not effective. Contact the OSU Tulsa County Master Gardeners for recommendations.
·        Plant summer bulbs such as cannas, dahlias, elephant ear, caladiums and gladiolus.
·        Remember, working wet soil will cause significant damage to the soil structure. Give it time to drain from recent rains, before tilling. Damage from tilling while wet may last for a very long time.


Sunday, May 10, 2020 0 comments By: Ask A Master Gardener

Powdery Mildew Affects Many Plants


Powdery Mildew
Brian Jervis: Ask a Master Gardener
Sunday, May 10, 2020
Q: Some of my plants are developing this white powdery substance on them. What is going on? AM
A: What you are describing is called powdery mildew and can occur on most ornamental plants such as crape myrtles, lilacs, photinias, zinnias, tall phlox, and others. Humid conditions over a variety of temperatures such as cool nights followed by warm days are conducive to powdery mildew growth. Have we been having any of those? Yes, we have. Younger growth also tends to be more affected.
The spores of this disease tend to overwinter on plant debris from the previous season. The spring awakens these dormant spores, which then begin making their way to your new plants. You will likely first notice powdery mildew on the leaves of your plants with them taking on a somewhat dusty appearance.
To prevent this disease from occurring, there are a few things you can do. First, give your plants some breathing room. Do not crowd them. The air circulation will help mitigate the conditions that encourage its development. You may even need to do some pruning to allow for greater air flow.
Also be mindful of when and how you are watering. The leaves of your plant do not need to be watered. The water needs to be placed on the root zone. Now, a lot of times there are sprinkler systems that are watering a large area at once and you cannot keep the water off the leaves. But if you are hand watering, water the roots, not the leaves.
Also, water in the morning. This allows time for water to evaporate off the leaves during the day rather than watering in the evening when water can remain on the leaves all night making a perfect breeding ground for disease.
You also do not want to fertilize your plants in late summer, which would encourage new growth that could become susceptible to powdery mildew.
If these strategies do not prevent development of powdery mildew, your plants can be sprayed with a fungicide or neem oil. Before spraying, remove as many of the infected leaves as is practical. You may say all the leaves are infected. If that is the case, do not remove all the leaves. But if the disease is limited to a certain area of the plant, then by all means, remove that branch or stem because you will be eliminating the source of the problem. You may need to repeat these treatments every two weeks for a while until you don’t see any more evidence of the disease. Chemical treatment will not repair damaged leaves, but it will stop its spread.
Garden tips
• Prune and feed all the spring blooming shrubs, such as azaleas and forsythia immediately after blooming, if needed. Azaleas need less fertilizer than many shrubs and often a yearly addition of mulch, as it decays, it will add all the nutrients they need.
• Seeding and sodding of warm-season grasses such as bermudagrass, Buffalograss and zoysiagrass is best performed in mid-May through the end of June. The soil temperatures are warm enough for germination and growth. These grasses need a long summer growing season to promote winter hardiness.